


What is bouquet layering: a complete skill guide
TL;DR:
- Bouquet layering arranges flowers into foreground, midground, and background zones for depth and visual interest. The spiral technique locks stems at 45 degrees to maintain bouquet shape and stability. Following the 3-5-8 rule ensures balanced proportions of focal, textural, and filler flowers for professional results.
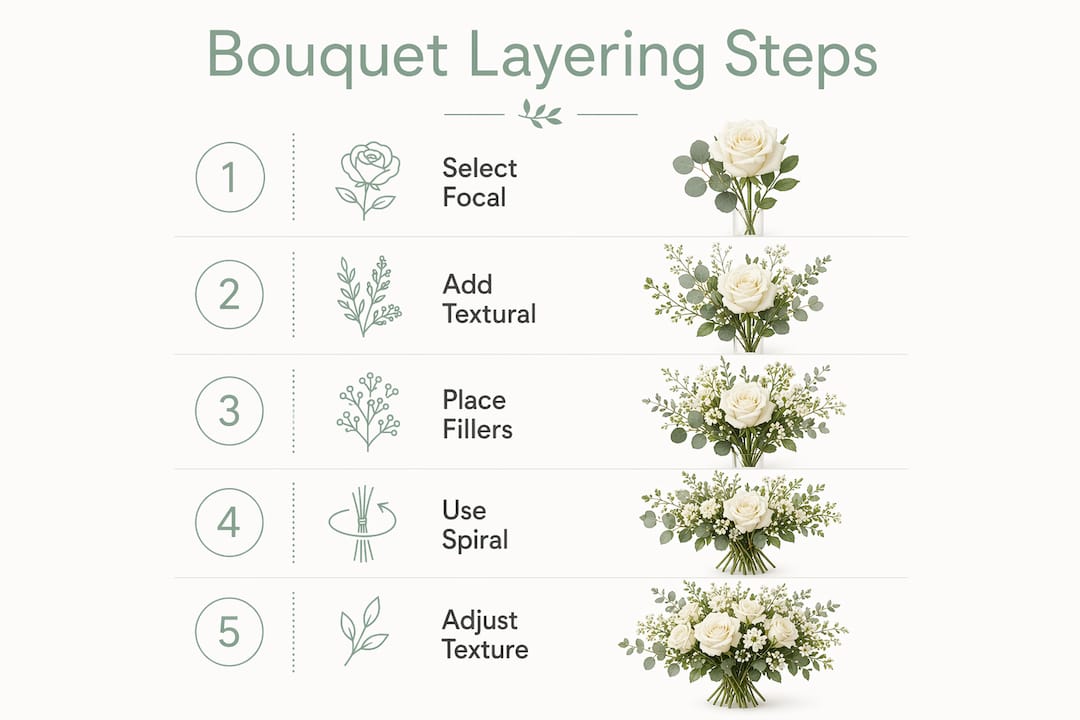
Bouquet layering is defined as the deliberate arrangement of flowers and foliage in distinct depth zones, foreground, midground, and background, to create a three-dimensional, visually dynamic result. This technique transforms a flat handful of stems into a structured, sensory-rich arrangement with genuine visual weight. Two foundational principles govern professional floral layering: the spiral technique, which locks stems into a stable cylindrical shape, and the 3-5-8 rule, which governs the ratio of focal, textural, and filler flowers. Mastering both gives you the framework to build bouquets that hold their shape, carry depth, and look professionally composed rather than casually assembled.
What is bouquet layering and why does it matter?
Bouquet layering is a fundamental floral technique that places flowers across three depth zones to produce sensory depth and visual interest. Without it, even expensive blooms sit flat and lifeless. The technique is what separates a professional arrangement from a supermarket bunch.
The three zones work as follows. The foreground holds low, spreading elements such as trailing ivy or small filler blooms. The midground carries the bulk of the arrangement, typically mass flowers and textural stems. The background features taller focal flowers or upright line stems that frame the whole composition. Each zone has a job, and skipping one collapses the visual hierarchy.
Floral layering also affects longevity. When stems are placed with intention and proper spacing, air circulates freely between blooms. That circulation slows bacterial build-up in the water and extends vase life across the whole bouquet.
What is the spiral technique and why is it essential?
The spiral technique is the structural backbone of every well-built hand-tied bouquet. It involves placing each stem at roughly a 45-degree angle while rotating the bouquet consistently in one direction. The result is a locked, cylindrical stem structure that holds its shape without wire, tape, or foam.
Without spiral placement, parallel stems slide against each other. The bouquet loses its dome shape, flowers droop to one side, and the arrangement collapses when set in a vase. The spiral locks each new stem against the previous ones, creating natural tension that keeps everything in place.
Here is how to apply the spiral technique correctly:
- Hold the first stem vertically between your thumb and forefinger, roughly one third of the way down.
- Add each new stem at a 45-degree angle, crossing over the previous stem at the same central point.
- Rotate the bouquet slightly after each addition, always in the same direction.
- Keep your grip point fixed. Moving your hand up or down breaks the angle consistency.
- Check the dome shape from above every five or six stems and adjust before continuing.
The consistent angle and rotation create a locked cylindrical structure that gives the bouquet both durability and volume. Flowers placed this way fan outward naturally, making each bloom visible from the front.
Pro Tip: Place a rubber band loosely around the stems at your grip point before you begin. It marks the correct height and stops your hand from drifting as the bouquet grows heavier.
How does the 3-5-8 rule guide balanced bouquet layering?
The 3-5-8 rule is the most reliable proportion guide in flower bouquet arrangement. It instructs you to use 3 focal flowers, 5 textural flowers, and 8 filler stems in a single arrangement. That 16-stem template prevents the overcrowded feeling that comes from guessing quantities, and it produces professional proportions every time.
Each category has a specific role in the layered structure.
| Flower category | Role in layering | Example flowers |
|---|---|---|
| Focal flowers (3 stems) | Visual anchor; placed in the midground | Peonies, garden roses, dahlias |
| Textural flowers (5 stems) | Add surface variety and movement | Lisianthus, ranunculus, waxflower |
| Filler flowers (8 stems) | Fill depth zones and soften gaps | Gypsophila, solidago, spray chrysanthemum |
Focal flowers carry the most visual weight, so three is enough. Adding more tips the balance and makes the bouquet feel heavy and one-note. Textural flowers at five stems create the mid-layer that gives the eye somewhere to travel between the focal blooms and the filler. Filler at eight stems sounds like a lot, but these are typically small-headed stems that spread across all three depth zones without dominating any of them.
The rule also scales. For a larger arrangement, multiply each number by the same factor: six focal, ten textural, sixteen filler. The proportions hold regardless of size.
Pro Tip: When choosing stems, match vase life across categories. Pairing a five-day focal flower with a twelve-day filler means half your bouquet will look spent while the other half is still fresh. Florists recommend pairing blooms with complementary vase lives to keep the whole arrangement looking its best for longer.
What role does texture play in effective bouquet layering?
Texture is the element that distinguishes professional floral designs from amateur ones. It creates movement, shadow, and a sense of richness that colour alone cannot achieve. Mixing tactile contrasts such as matte with glossy, or velvety with waxy surfaces, prevents flat and monotonous arrangements.
The main texture categories to work with are: ruffled (peonies, garden roses), airy (gypsophila, astrantia), spiky (allium, sea holly), clustered (waxflower, lilac), and smooth (tulips, calla lilies). A bouquet built from a single texture category reads as dull, regardless of how beautiful the individual flowers are. Pairing a ruffled peony with spiky sea holly and airy gypsophila gives the eye three distinct surfaces to move across.
The squint test is the most practical way to assess texture balance. Squinting at the finished bouquet blurs fine detail and forces you to see overall weight, colour distribution, and texture spread. If one side looks heavier or denser, the texture balance is off.
Common texture layering mistakes to avoid:
- Using only round, ruffled flowers with no linear or airy contrast.
- Placing all smooth-surfaced stems together in one cluster rather than distributing them.
- Ignoring foliage texture. Leaves with glossy surfaces contrast well against matte petals.
- Choosing flowers purely by colour without considering surface quality.
- Neglecting the back of the bouquet. Texture should read from all angles, not just the front.
Pro Tip: Hold the bouquet at arm’s length and rotate it slowly. If any angle looks flat or sparse, thread a single airy stem such as gypsophila or ammi majus into that zone before tying off.
What is the recommended assembly order for a layered bouquet?
Assembly order is not a stylistic preference. It is a structural decision that determines whether the bouquet holds together or collapses. Starting with structure and building outwards prevents heavy focal flowers from dragging lighter stems down and ruining the form.
The correct five-step order is:
- Greenery and structure. Begin with foliage such as eucalyptus, ruscus, or pittosporum. These stems form the outer frame and establish the bouquet’s width and height. Foliage acts as a visual bridge between layers, connecting foreground and background zones and adding depth perception.
- Mass flowers. Add your filler blooms next. These fill the background and midground zones and give the focal flowers a surface to sit against.
- Focal flowers. Place your three focal stems now. They sit in the midground and draw the eye. Vary their heights slightly rather than placing all three at the same level.
- Line stems. Add tall, upright stems such as snapdragons, delphiniums, or liatris. These break the dome shape and introduce movement and vertical energy.
- Airy accents. Finish with delicate, lightweight stems like gypsophila, astrantia, or nigella. These thread between all other layers and soften the overall silhouette.
The table below shows what happens when this order is followed correctly versus when it is reversed.
| Assembly approach | Outcome |
|---|---|
| Correct order (greenery first, accents last) | Stable structure, even weight distribution, clear depth zones |
| Incorrect order (focal flowers first) | Heavy stems pull lighter ones down, depth zones collapse, bouquet loses shape |
Trim all stems at a 45-degree angle before placing them. That cut maximises the surface area drawing water and keeps flowers hydrated throughout the assembly process. For a detailed walkthrough of the full process, the step-by-step luxury arrangement guide on the Blumeflowers blog covers each stage with additional finishing advice.
How to apply bouquet layering techniques in practice
Applying these techniques consistently is what builds genuine skill. Start by selecting your focal texture first, then choose textural and airy stems that contrast with it. If your focal flower is a ruffled peony, pair it with spiky sea holly and airy gypsophila rather than another ruffled bloom.
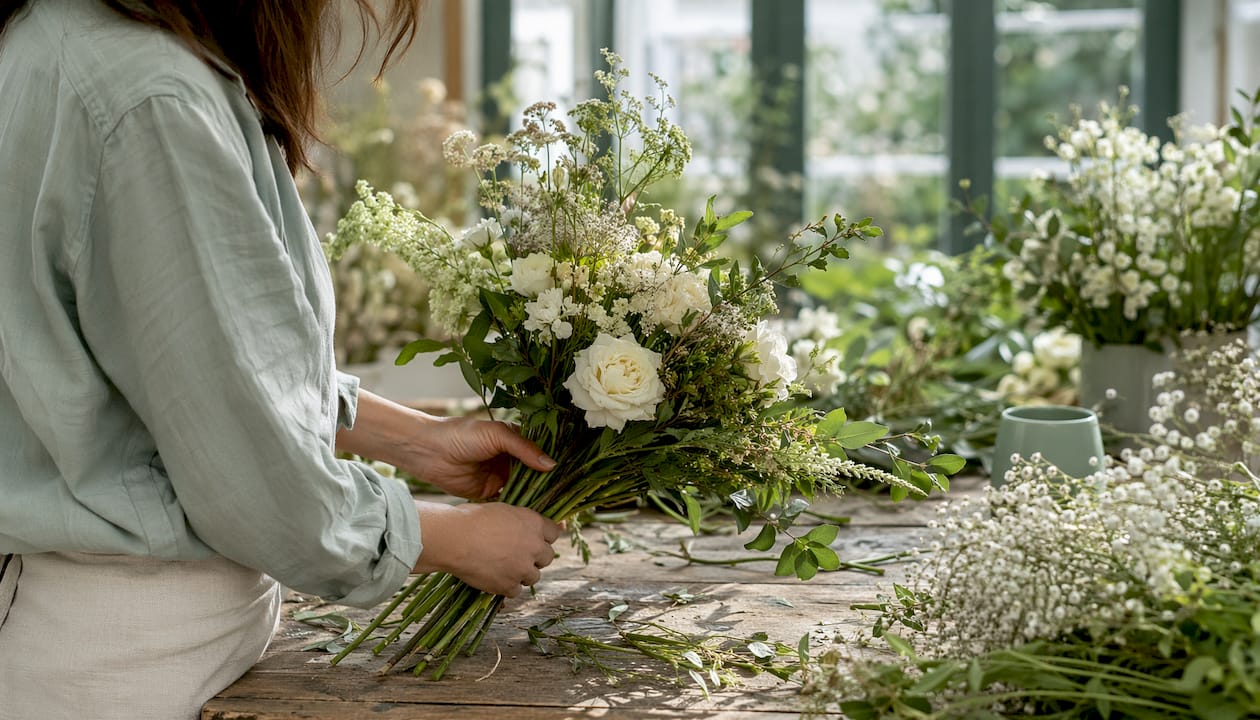
Seasonal selection makes a real difference to both quality and cost. Flowers in season are more abundant, fresher on arrival, and less expensive. Working with what is naturally available in a given month also means your bouquets align with the colour palettes that feel most current and alive.
The most common mistake beginners make is the “cupcake pile” effect. Placing all focal or ruffled flowers on the same plane creates a flat, crowded top with no depth beneath it. Varying stem lengths and threading line stems through the arrangement breaks this up and introduces the sculptural quality that defines professional work.
Practical layering tips for better results:
- Cut stems to three different lengths before you begin: short, medium, and tall.
- Place the tallest stems at the back and the shortest at the front to reinforce depth zones.
- Rotate the bouquet every few stems to check balance from multiple angles.
- Use the squint test before tying off to catch any flat or heavy zones.
- Refresh the water daily and recut stems every two days to extend vase life.
Pro Tip: Condition all stems in clean water for at least two hours before arranging. Flowers that have had time to hydrate are more pliable, less likely to snap during spiral placement, and last significantly longer once arranged.
For further inspiration on modern bouquet design, the Blumeflowers blog covers current styling trends with practical visual references.
Key takeaways
Bouquet layering requires the spiral technique, the 3-5-8 rule, and deliberate texture contrast to produce arrangements with genuine depth and professional structure.
| Point | Details |
|---|---|
| Layering creates depth | Arranging flowers across foreground, midground, and background zones produces three-dimensional results. |
| Spiral technique is structural | Placing stems at 45 degrees and rotating locks the bouquet shape without additional supports. |
| 3-5-8 rule governs proportion | Use 3 focal, 5 textural, and 8 filler stems to achieve balanced, professional proportions. |
| Texture contrast is non-negotiable | Mixing ruffled, airy, spiky, and smooth surfaces prevents flat, monotonous arrangements. |
| Assembly order determines success | Build from greenery outward to focal flowers, then finish with airy accents for lasting structure. |
Why layering changed how I see every bouquet
I spent years thinking a beautiful bouquet was simply about choosing beautiful flowers. The variety, the colour, the freshness. What I missed entirely was structure. The first time I applied the spiral technique properly and followed the 3-5-8 rule from start to finish, the difference was immediate and almost embarrassing. The same flowers I had been using for months suddenly looked like something from a professional studio.
What strikes me most about bouquet layering is how forgiving it becomes once you internalise the assembly order. Starting with greenery feels counterintuitive. You want to get to the good stuff. But that foliage frame is what holds everything else in place. Skip it and your focal flowers have nothing to lean against.
Texture is the part most people underestimate. Colour gets all the attention, but it is the contrast between a velvety rose petal and a spiky allium head that makes a bouquet genuinely interesting to look at. I now think of texture before I think of colour when selecting stems. That single shift improved my arrangements more than any other change.
The squint test sounds almost too simple to be useful. It is not. Stepping back and blurring your focus reveals weight imbalances and flat zones that you simply cannot see when you are close to the work. Build it into your process every time, not just when something feels off.
If you are developing your floral skills, commit to the assembly order and the 3-5-8 rule for at least ten bouquets before you start experimenting. The rules are not constraints. They are the foundation that makes creative experimentation actually work.
— Steve
Expertly layered bouquets from Blumeflowers
Seeing these techniques in a finished arrangement is one of the fastest ways to understand what layering actually achieves.
Blumeflowers designs every bouquet with deliberate depth, texture contrast, and the kind of structural care this guide describes. The Beautifully Simple Peony Bouquet is a strong example of focal flower placement done well, with ruffled peonies set against complementary textural stems. For a study in clean line and colour layering, the Showstopper Pink Bouquet shows how varied stem heights and airy accents produce a bouquet with genuine visual movement. Each arrangement is available for same-day and next-day delivery across Birmingham, Solihull, and surrounding areas.
FAQ
What is bouquet layering in simple terms?
Bouquet layering is the technique of placing flowers across three depth zones, foreground, midground, and background, to create a three-dimensional arrangement with visual depth and balance.
What is the 3-5-8 rule in floral arrangement?
The 3-5-8 rule uses 3 focal flowers, 5 textural flowers, and 8 filler stems to produce a balanced, professional bouquet. The ratio prevents overcrowding and ensures each flower type has a clear role in the arrangement.
Why does the spiral technique matter for layering?
The spiral technique locks stems at a consistent 45-degree angle, creating a stable cylindrical structure. Without it, parallel stems slide and the bouquet loses its shape and depth zones.
How do I avoid a flat-looking bouquet?
Vary stem lengths across three heights and use at least three distinct texture categories. The squint test helps identify flat or heavy zones before you tie off the arrangement.
What flowers work best for each layering zone?
Focal flowers such as peonies and dahlias suit the midground. Filler stems like gypsophila and solidago work across all zones. Tall line stems such as delphiniums and snapdragons anchor the background and add vertical movement.